 Opening mugs
 Posters
 Desk mats
 Coasters & stickers
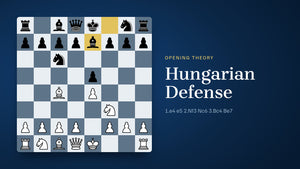


The Hungarian Defense (1.e4 e5 2.Nf3 Nc6 3.Bc4 Be7) is a low-theory answer to the Italian Game that sidesteps the Two Knights and the Giuoco Piano, at the cost of a passive bishop and less space once White plays 4.d4.
In this guide
What the Hungarian Defense is
The Hungarian Defense is the quiet reply 3...Be7 to the Italian Game. After 1.e4 e5 2.Nf3 Nc6 3.Bc4, Black does not put the bishop on the active square c5 or develop the second knight to f6. Instead the bishop goes to e7, where it guards the kingside and prepares castling. The opening is classified as C50.
It was first analysed in the eighteenth century by Carlo Cozio. The name comes from a famous correspondence match between Paris and Pest, the eastern half of today's Budapest, played between 1842 and 1845.
It has never been a fashionable opening, but it has had distinguished users. Samuel Reshevsky, Vlastimil Hort, Tigran Petrosian and Vasily Smyslov all played it, mostly players with a defensive, positional style who were happy to absorb pressure and wait for a mistake.
What 3...Be7 avoids and what it gives up
The main attraction of 3...Be7 is what it avoids. After 3...Nf6, the Two Knights Defense, Black has to know the sharp lines after 4.Ng5, including the knight sacrifice on f7 covered in our guide to the Fried Liver Attack. After 3...Bc5, Black has to be ready for the Evans Gambit and the Italian Gambit. With 3...Be7 most of that theory disappears.
The price is activity. On e7 the bishop does not pressure f2 or d4, and it blocks the queen's view of the kingside for a while. White gets a free hand in the centre. Tim Harding and George Botterill put it bluntly in 1977: "The Hungarian Defence can only be played for a draw. White should have an edge in most lines."
That verdict is about ambition rather than soundness. The opening does not lose by force, and its positions are solid. Black simply accepts a smaller share of space in exchange for a position that is hard to break and easy to understand.
The main line: 4.d4 d6
White's most testing reply is to claim the centre at once with 4.d4. Black usually holds the e5 strongpoint with 4...d6, and White has three main ways to continue.

5.d5 Nb8 closes the centre. The knight retreats and White continues with the bishop to d3 and the pawn to c4, for example 6.Bd3 Nf6 7.c4. The structure resembles the Old Indian Defense: White has more space on the queenside, and Black must reorganise behind the pawn chain.
5.dxe5 dxe5 6.Qxd8+ Bxd8 7.Nc3 exchanges queens. Black continues with 7...Nf6 or 7...f6, and White keeps a slightly better queenless middlegame. For Black, the upside is that there is little danger of a quick attack.
5.Nc3 keeps the tension and simply develops, leaving Black to decide when to release the centre.
There is one trap to know in the exchange line. Black must recapture on e5 with the pawn, not the knight. After 5.dxe5 Nxe5? 6.Nxe5 dxe5 7.Qh5 the queen attacks f7, together with the bishop on c4, and the pawn on e5 at the same time. Black cannot defend both, and White wins a pawn.

This mug prints the opening's name and the board diagram of the position after 3...Be7 on both sides, with the Chess4pro logo between them.
Giving up the centre: 4...exd4
Black can also take on d4 with 4...exd4. Lichess files this position under the Scotch Game, Benima Defense (C44), because the same position arises after 1.e4 e5 2.Nf3 Nc6 3.d4 exd4 4.Bc4 Be7. White has two ways to continue.
5.Nxd4 recaptures and leads to a Scotch structure in which White has a spatial edge. This is the simplest route.
5.c3 is a gambit that hopes for 5...dxc3 6.Qd5. White threatens Qxf7, which would be mate, because the black king has no squares: d7 holds its own pawn and f8 would be covered by the queen. Black has to defend f7, for example with 6...Nh6. Against 5.c3, Black can also decline with 5...Nf6 6.e5 Ne4, known as the Tartakower Variation, or with 5...Na5, attacking the bishop on c4, an idea recommended by Mikhail Chigorin.
White's quieter fourth moves
Not every White player goes for d4 at once. The quieter moves usually transpose to other openings or give Black an easy game.
| White's 4th move | Black's usual reply | What happens |
|---|---|---|
| 4.d4 | 4...d6 or 4...exd4 | The critical test; White gets more space |
| 4.d3 | 4...Nf6 | Transposes to a quiet Two Knights line (C55) |
| 4.c3 | 4...Nf6 | Steinitz's choice; White prepares d4 |
| 4.O-O | 4...Nf6 | Less testing than 4.d4; a typical line is 5.Nc3 d6 6.d4 Bg4 |
Against 4.d3 Nf6, Black reaches a version of the Two Knights Defense in which White has already chosen the slow d3 plan, so the sharp 4.Ng5 lines are off the table. Against 4.O-O Nf6 5.Nc3 d6 6.d4 Bg4, Black pins the knight on f3 and puts pressure on d4, a setup that also appears in the Philidor Defense.
How Black stays solid
This opening rewards a clear plan more than memorised moves. Three habits keep Black's position healthy.
First, keep the pawn on e5 as long as it is not lost, and recapture with the pawn if White exchanges on e5. The pawn on e5 gives Black's pieces squares and stops White's pieces from settling in the centre.
Second, develop the kingside before anything else: knight to f6, castle, then decide where the queenside pieces go. In the closed 5.d5 structure the knight that returned to b8 usually comes back into play via d7.
Third, know when to change course. If you prefer open piece play, 4...exd4 leads to Scotch positions, explained in our Scotch Game guide. If you prefer to keep the centre closed, 4...d6 is the move.
Both sides of the same opening: the Italian Game after 3.Bc4 and the Hungarian Defense after 3...Be7, each with the name and the diagram of its key position. Two mugs are 10% off automatically at checkout, three or more 15%.
Who should play the Hungarian Defense
The Hungarian Defense suits players who want a reliable answer to 3.Bc4 without studying the Two Knights or the Evans Gambit. It is especially useful for players with limited study time, an approach we discuss in our guide to surviving the opening without knowing theory.
It is less suitable if you want winning chances from the opening itself. White keeps the initiative in most lines, and Black's counterplay comes later, in the middlegame. If you are deciding what to play against 1.e4 e5 as a whole, our comparison of the Italian Game and the Ruy Lopez and our Giuoco Piano guide show the more active alternatives.
For White, the lesson is equally clear: answer 3...Be7 with 4.d4, take the space you are offered and do not expect Black to collapse quickly.
Questions
Is the Hungarian Defense a good opening?
It is solid but passive. Harding and Botterill wrote in 1977 that it "can only be played for a draw" and that White should have an edge in most lines, yet it has been played by Reshevsky, Petrosian and Smyslov.
What is the best reply to the Hungarian Defense?
4.d4 is considered the most testing. After 4...d6 White chooses between 5.d5, 5.dxe5 and 5.Nc3; after 4...exd4 5.Nxd4 the game becomes a Scotch structure with more space for White.
Why is it called the Hungarian Defense?
It takes its name from the correspondence match between Paris and Pest, played from 1842 to 1845. Carlo Cozio had analysed the move in the eighteenth century.
Does the Hungarian Defense avoid the Fried Liver Attack?
Yes. The Fried Liver Attack only arises from the Two Knights Defense after 3...Nf6. With 3...Be7 Black avoids 4.Ng5 lines altogether.