 Opening mugs
 Posters
 Desk mats
 Coasters & stickers
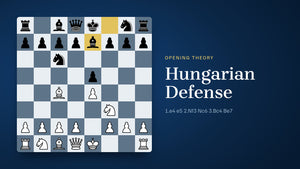


The Fried Liver Attack (1.e4 e5 2.Nf3 Nc6 3.Bc4 Nf6 4.Ng5 d5 5.exd5 Nxd5 6.Nxf7) gives up a knight to drag Black's king to e6, and Black avoids it altogether by answering 5.exd5 with 5...Na5 instead of recapturing.
In this guide
What the Fried Liver Attack is
The Fried Liver Attack is a knight sacrifice on f7 in the Two Knights Defense, one of the main branches of the Italian Game. White gives up a whole piece to pull the black king into the centre of the board and then attacks it with queen, bishop and knight. It is classified as C57.
The English name is a translation of the Italian Fegatello, a liver dish, which says something about how the black king is meant to feel. The idea is very old: the earliest known example is credited to Giulio Cesare Polerio, the Italian player who recorded the Two Knights Defense around 1580.
The Fried Liver has a special reputation among club players because it can win in a handful of moves, yet it is not a trick that depends on a blunder. Black's mistake comes one move earlier, and if you understand that moment, you can play the line confidently with either colour.
How 4.Ng5 leads to f7
The starting position is 1.e4 e5 2.Nf3 Nc6 3.Bc4 Nf6, the Two Knights Defense. Black develops a second knight instead of the bishop, and White has an aggressive option: 4.Ng5. The knight and the bishop on c4 now aim at f7 together, a square defended only by the black king.
The move breaks a basic principle, moving the same piece twice before development is finished. Siegbert Tarrasch famously dismissed it as "a duffer's move", in German a Stümperzug. Practice disagrees: 4.Ng5 has been played by Steinitz, Fischer, Karpov, Kasparov and Anand.
Black's standard reply is 4...d5, blocking the bishop's diagonal. After 5.exd5 White threatens to win a pawn, and Black has to choose. The natural recapture 5...Nxd5 is the move that allows the Fried Liver Attack. The knight on d5 looks well placed, but it stands on the same diagonal as the bishop on c4, and f7 is still weak.
The sacrifice and the king walk to e6
White now plays 6.Nxf7. After 6...Kxf7 Black is a knight up for a pawn, but the king has lost its shelter. The follow-up is 7.Qf3+, attacking the king and the knight on d5 at the same time.
Black has only one good answer: 7...Ke6, defending the knight with the king. The alternatives give the material back or worse. If 7...Kg8, then 8.Bxd5+ leads to mate, for example 8...Qxd5 9.Qxd5+ Be6 10.Qxe6#. Other king moves let White take on d5 and keep a healthy extra pawn.
The king on e6 is exactly where White wanted it. It defends d5, but it is exposed on an open board, in front of its own pawns rather than behind them.
The fight for the pinned knight on d5
The key move of the attack is 8.Nc3. Now three white pieces attack the knight on d5: the knight on c3, the queen on f3 and the bishop on c4. Black defends it twice, with the king and the queen on d8. And the knight cannot move, because the bishop pins it to the king.

Black's usual reply is 8...Nb4, bringing the other knight to defend d5 and eyeing c2. The pin explains the notation: only the knight from c6 can go to b4. Black then wants a pawn on c6 to support the knight for good.
White has several ways to continue. 9.a3, recommended by Yakov Estrin, chases the knight at once, but Black can answer 9...Nxc2+ and, according to Wikipedia's summary of the theory, stands well. Later analysts preferred 9.O-O, 9.Qe4 or 9.Bb3, keeping the pressure without allowing the fork on c2.
The verdict in the sources is consistent: White gets a strong attack, but it has not been proven to win by force. In practice, defending is much harder than attacking, which is why the line is so dangerous in fast games.
The Italian Game mug prints the opening's name and the board diagram of the position after 3.Bc4 on both sides: the bishop already aimed at f7, a few moves before the sacrifice on f7 begins.
The Lolli Attack: 6.d4
White does not have to sacrifice at once. After 5...Nxd5, the alternative is 6.d4, the Lolli Attack, named after the eighteenth-century Italian analyst Giambattista Lolli. White opens the centre first, so that the black king will have even fewer safe squares if it is drawn out later.
Bobby Fischer rated 6.d4 very highly in My 60 Memorable Games, in his notes to a 1963 game against Arthur Bisguier. That judgement is one of the reasons why strong players rarely recapture with 5...Nxd5: Black faces either the sacrifice on f7 or a central break that keeps the initiative with White.
What Black should play instead: 5...Na5
Black's main line, generally considered best, is 5...Na5, known as the Polerio Defense (C58). The knight attacks the bishop on c4 before White can use it on f7, and Black accepts being a pawn down for active development.

The usual continuation is 6.Bb5+ c6 7.dxc6 bxc6. Now White chooses where to put the bishop. The classical move is 8.Be2, and after 8...h6 9.Nf3 e4 10.Ne5 White has an extra pawn and the better pawn structure, while Black has a lead in development. Mikhail Chigorin showed in the nineteenth century that Black's compensation is real. Today 8.Bd3 is treated as the main line, with 8.Qf3 as another option.
The table compares Black's main choices after 4.Ng5, with the Lichess opening names.
| Black's choice | Name (ECO) | What to expect |
|---|---|---|
| 5...Nxd5 | Allows the Fried Liver Attack (C57) | 6.Nxf7 or 6.d4, both dangerous for Black |
| 5...Na5 | Polerio Defense (C58) | A pawn down for development; the main line |
| 5...b5 | Ulvestad Variation (C57) | The accepted reply is 6.Bf1 |
| 5...Nd4 | Fritz Variation (C57) | White usually answers 6.c3 |
| 4...Bc5 | Traxler Counterattack (C57) | Black ignores f7 and counterattacks f2; no clear refutation is known |
For the study wall and the desk: the poster ($32 or $45, unframed) and the 16×32 in desk mat ($42) show the opening's name, the board diagram after 3.Bc4, its main line and the ECO code. Opening mugs bought together are discounted automatically: 10% for two, 15% for three or more.
The Fried Liver Attack in practice
With White, the Fried Liver is worth knowing because the trigger is so natural. Many players recapture on d5 by reflex, and after 6.Nxf7 they have to find a series of only moves under pressure. If your opponent plays 5...Na5 instead, you are a pawn up in a well-known position and can play calmly. Our Giuoco Piano guide covers the quieter 3...Bc5 lines, and our comparison of the Italian Game and the Ruy Lopez helps if you are choosing between 3.Bc4 and 3.Bb5.
With Black, the lesson is to learn 5...Na5 and its first ideas: the check on b5, the pawn exchange on c6, the kick with the h-pawn and the advance to e4. You do not need to memorise long lines to avoid the worst. The same position can also arise from the Bishop's Opening, after 1.e4 e5 2.Bc4 Nf6 3.Nf3 Nc6, so Black should be ready for it even against players who never start with 2.Nf3.
Finally, remember why 6.Nxf7 works: the knight on d5 is pinned, and the king cannot both defend it and stay safe. For more opening ideas built on the same weakness on f7, see our list of the deadliest chess opening traps.
Questions
Is the Fried Liver Attack sound?
It gives White a strong and practical attack, but it has not been proven to win by force. Defending is very hard over the board, so it is especially dangerous at short time controls.
How does Black avoid the Fried Liver Attack?
By not recapturing on d5. After 4.Ng5 d5 5.exd5, the main line is 5...Na5, the Polerio Defense, which attacks the bishop on c4 before White can sacrifice on f7.
What is the difference between the Fried Liver and the Lolli Attack?
Both start after 5...Nxd5. The Fried Liver sacrifices at once with 6.Nxf7, while the Lolli Attack plays 6.d4 first to open the centre. Bobby Fischer rated 6.d4 very highly.
Why does the black king have to go to e6?
After 7.Qf3+ the king must keep defending the knight on d5. 7...Kg8 runs into 8.Bxd5+ with mate, and other moves give the knight back.